
Disclosure: This post may contain affiliate links, meaning, at no additional cost to you, I will earn a tiny commission if you click through and make a purchase. I will likely blow said commish on Spicy Margaritas.
Y’all I hope you grabbed some sustenance because you’re about to experience, first hand, the RAMBLE side of Roost & Ramble. Things are going to get longwinded babes. If you’d just rather look at the pictures and maneuver your way through the mystery of the these DIY Plywood Floors like an Ikea instruction manual, no hard feelings. I just think that understanding the ‘why’ behind some of the things we did will serve you better in determining if this is a necessary step for your own mission, should you choose to accept it.
This DIY Plywood Floor was my most requested tutorial from the 2019 Fall One Room Challenge ™ sponsored by Better Homes and Gardens and I am HERE TO DELIVER my darlings! Curious to know if you’re here repping #TeamThisIsGeniusAndINeedToKnowHowItsDone, or #TeamThisChickIsCrazyAndIWannaKnowLikeWTF. Either way, welcome! I am so thrilled to have you because the only thing I love more than spicy margaritas is Y.O.U.
First, here’s what you’ll need:
SUPPLIES NEEDED
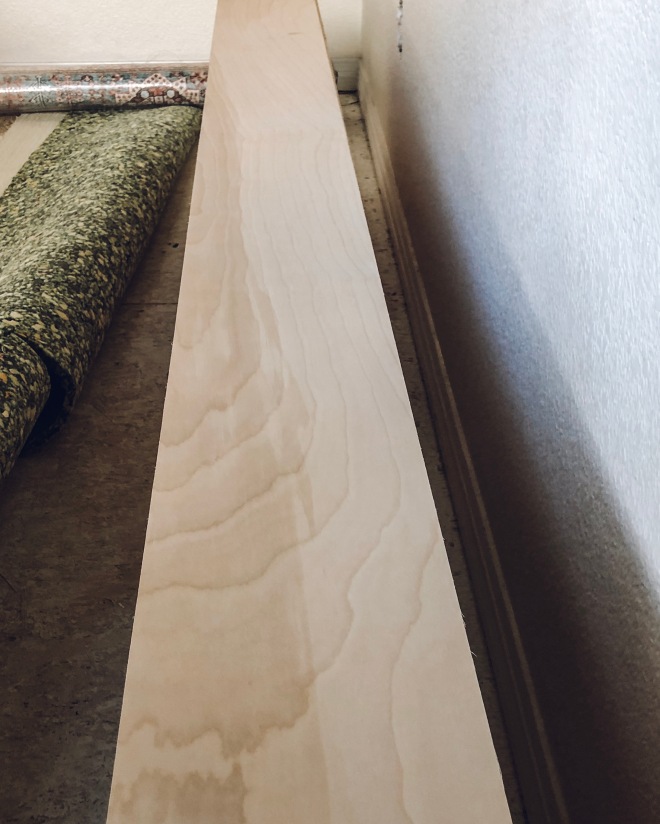
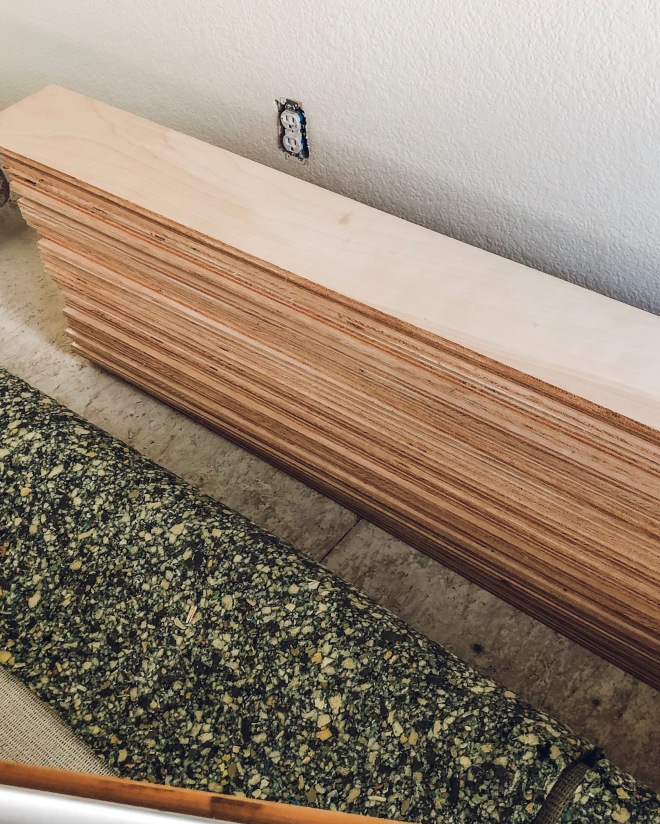
- 1/2″ Birch Plywood sheets ripped down to 6 1/4″ wide planks
- Liquid Nail Interior Projects Construction Adhesive
- 1 1/4″ Finish Nails
- 80 grit sanding block
- 220 grit sanding block
- Miniwax Pickling Oak Stain
- Miniwax Polycrylic Matte Water-based Polyurethane
TOOLS USED
- 12″ Sliding Compound Miter Saw
- Caulking gun
- Nail Gun
- Air Compressor
- Hand Saw
- Coping saw (recommended)
- Wood File
THE OG: MANDI AT VINTAGE REVIVALS
Before we dig in, you really should start here, where it all began. I can’t even begin to tell the story of these floors without first giving all the glory to the OG, Mandi at Vintage Revivals. The pine floor installation she did several years ago in her 1972 Travel Trailer ‘The Nugget,’ lured me in and has had a vice grip on my heart ever since. I just knew that my life would simply be incomplete without a version of this in my own home someday.

I read her tutorial from start to finish at least 20 times; It is solid gold you guys. She paved the way and provided so many great tips. As such, this tutorial is only intended to build upon what Mandi started. SO GO READ HERS FIRST! That said, we made enough changes in the execution from materials to pattern size that I figured these guest room floors warranted a tutorial of their very own.
THE DIFFERENCES
Material: Mandi used 1×4 pine boards and we chose 1/2″ birch plywood sheets. There are a couple reasons for this: First, we transition into this bedroom from traditional 3/4″ hardwood floors in the hallway. Picking any material 1′ in height would mean we’d ‘step up’ into the room and that felt less than ideal. Second, pine is a relatively soft wood that (as Mandi points out) dents and scratches easily. While we’re certainly not looking for a perfect finish, searching out something a bit sturdier was certainly appealing.
Pattern size: We’re translating this stunning pattern into a much larger footprint; An 11×12′ guest room vs. a travel trailer. Our main objective was to eliminate as much waste as possible from of a full sheet of plywood while still maintaining the scale we wanted.
WHY PLYWOOD?
I chose to use plywood primarily because it’s robust and durable. It boasts uniform strength and does not expand or contract nearly as much as regular wood. Birch plywood specifically has a very delicate grain pattern and a beautiful, simple finish.
Extra bonus: It is both inexpensive and environmentally friendly because it uses much less actual wood than a full sheet of, well, wood. #savethetrees
PREPPING THE SURFACE
Once we removed the old carpeting and pad, our main goal was to get the smoothest, cleanest surface possible. We ripped out all the staples and tack strip and hammered in any that broke or we could not remove. Fortunately our OSB was in great shape and free from holes, bulging/sinking sections and uneven seams.
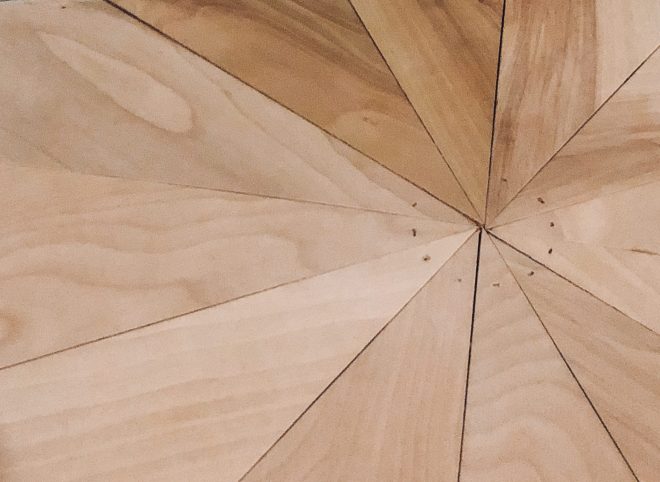
GEOMETRY AND STUFF
If you’re a geometry teacher, here’s a great extra credit question for your next exam:
QUESTION: “Meg has a 4×8′ sheet of plywood. She wants to cut as many 30°/120°/30° triangles out of said sheet as she can with the least amount of waste. The height of the triangle needs to be between 6-8″ to achieve desired scale and also needs to accommodate for blade cut loss. What is the ideal height of the triangle that will produce the least amount of waste? Please show your work.
Bonus points: How many triangles will she get from one sheet and what will the length of each of the sides be in inches?
It was a mathematical nightmare that I had to have my sister-in-law work out because math is gross. I’m certain she’d be super happy to explain it to you in great detail over a cup of coffee while your eyes glaze over because she’s a crazy like that. In the end, here’s what we determined:
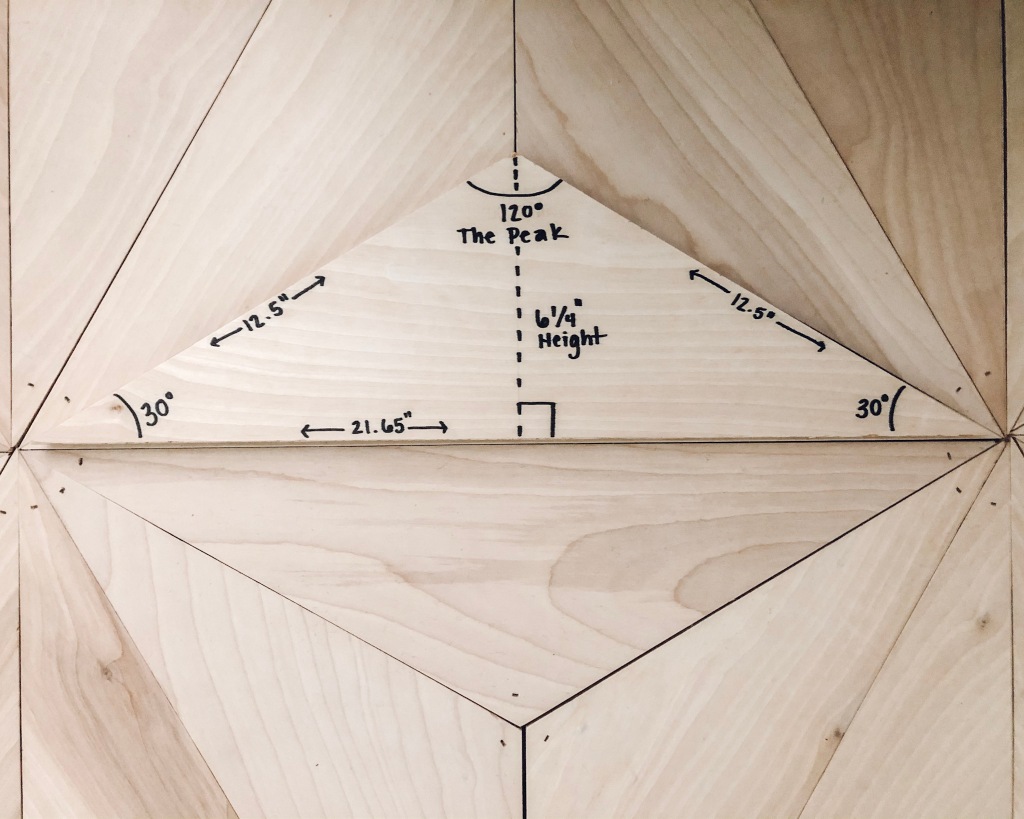
ANSWER: The Ideal triangle height is 6 3/4″ meaning this is how wide each plank should be cut. Meg will get 7 planks and can make 7 full pieces from each plank for a total of 49 triangles per sheet, plus 14 scrap pieces that she can use later to make perimeter room cuts. The triangles will be 13 1/2″ x 13 1/2″ x 23 3/8″.

I followed directions and did exactly what she Liz said. We purchased 5 full sheets of plywood and had them all ripped onsite to 6 3/4″ planks by my main man Octi at Home Depot in Fort Collins. It was impossible to know exactly how many sheets we would need until we started laying out the floor but we calculated the square footage of the room and added 20% to start. At $46/sheet we decided to err on the side of caution knowing we’d likely need more.

PREPPING FOR INSTALL
We kept the planks in the guest room to allow for acclimatization. Not sure if that’s necessary where plywood is concerned but we know its a common practice for traditional wood flooring so we figured we’d just follow suit.
OUR FIRST MISTAKE
After a few days of acclimating, we set up the saw and started making our first cuts. We quickly realized that our borrowed sliding compounding miter saw could not reach quite far enough to make the full 13.5″ length of the cut EVEN THOUGH its a 12” blade and EVEN THOUGH it slides out several inches. (Still scratching my head on this.) Anyway every single plank had to be trimmed down an additional 1/2″ to 6 1/4″ on our table saw. Turns out it’s important to know the max cut length of your saw before finalizing plans. Lesson learned.


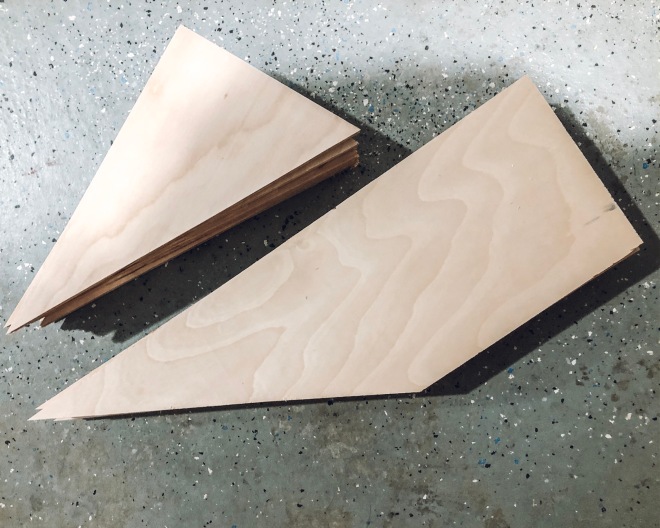
Here are the finished measurements for the final triangle, as well as the a quick reference for the ‘height’ and the ‘peak’ that I speak to.
MAKING THE CUTS
To make a 30° cut, you’ll want to set your turn base to 60° on the miter saw.

Make your first cut. The peak of the triangle will be facing away from you.
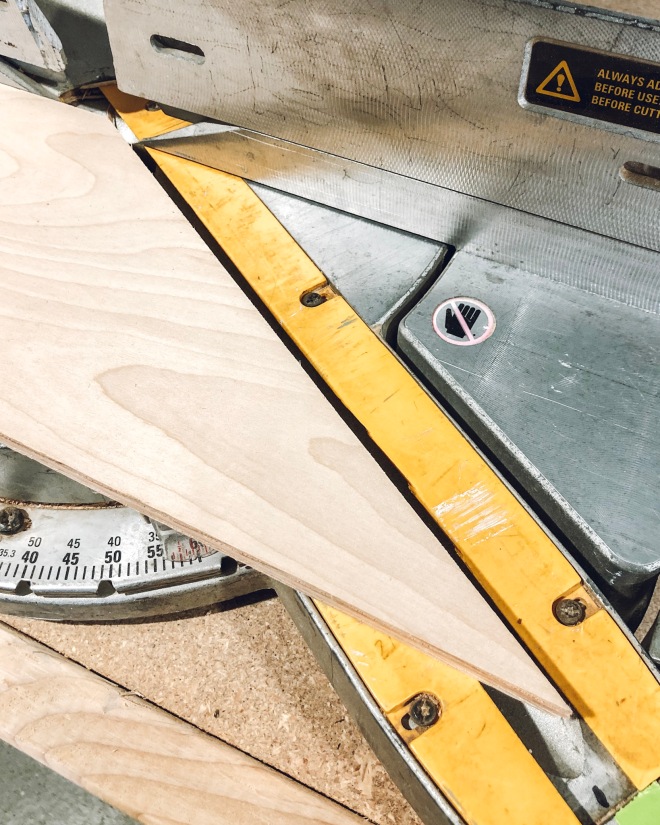
Flip the board upside down so the peak of the triangle is now pointing towards your body. Line the saw up with the top of peak to make your second cut.


Make a mark on your miter saw base with a sharpie or a piece of tape. This will be your guide for lining up your following cuts moving forward to speed things along and ensure uniformity.

*Make sure you set aside your scrap pieces because they come in handy when filling in the perimeter of the room.
Once you start rolling it’s really just a game of perseverance. **Don’t forget your ear and eye protection!
After the cuts were made, I sanded down all six edges of each piece with an 80-grit sanding block to clean clean up the splinters and round out the sharp edges.

INSTALLATION
It took some experimenting to figure out exactly how we wanted to lay out the pattern within the space. One option was to start from the back wall to ‘square’ it up with the rest of the room (first photo). The second option was to start the pattern at the entry of the room building out from the threshold towards the far corner (second photo). You can see both options below.


After some deliberation, we chose to start the pattern at the threshold and build out from there. We knew it would be the most visible part of the floor once the rug and furniture were brought into the room. I’m 100% sure this layout made for way more challenging cuts and headaches, but if I had it to do all over again I wouldn’t change a thing. That symmetry that greets our beloved guests at the threshold is perfection. No regrets.
SECURING THE PIECES TO THE SUBFLOOR
Despite all the carefully made cuts, we learned not all triangles were made to be exactly the same size. It became super important to dry fit multiple pieces at time (12-15) and find the pieces that ‘fit’ well together.
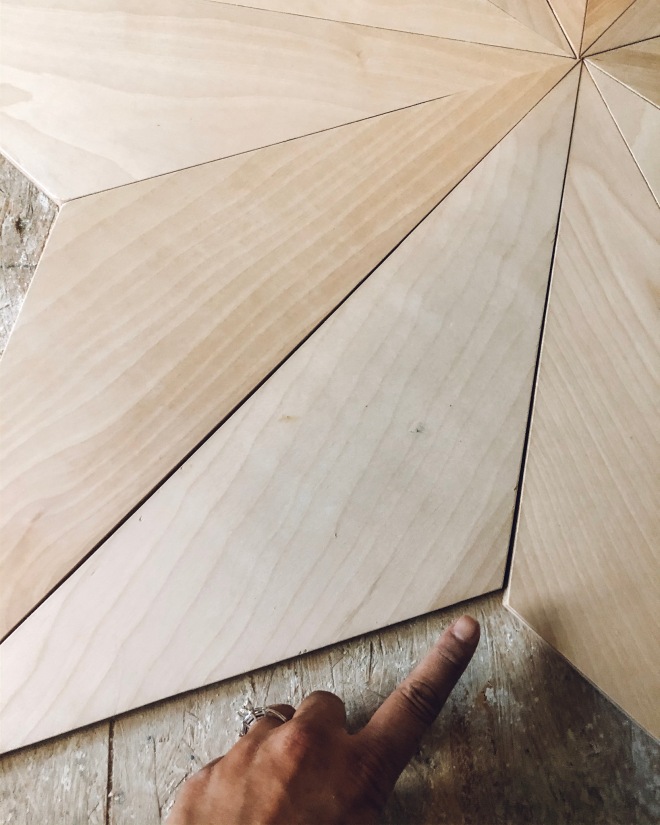
Once I had a full ‘star’ laid out, I would put a strip of Liquid Nail on the backside, lay each piece back into place and nail the points together using a nail gun and a circle template (pretty sure it’s the top of an Ikea spice jar) to ensure conformity. I would not nail down the other two points of the triangles until I had their adjoining pieces in place. This offered me the chance to move each around slightly, pivoting from the one nailed corner until I had a snug fit.


We laid out the entire floor with all the full pieces first, then we moved on to the perimeter cuts.

MAKING PERIMETER CUTS
We used a paper template to help make cuts to the perimeter of the room. The template was made by taping two pieces of card stock together and tracing one of our precut triangles. Once the template was made, we’d place it into position, taking care to ensure it was facing the right way (peak in or out depending on what the pattern dictated) and crease the paper at the cut line. We made sure to leave a small gap between the edge of each piece and the wall to allow for minor expansion as you would with a regular wood floor installation.
We ended up using a bunch of our scrap pieces to make the smaller cuts.


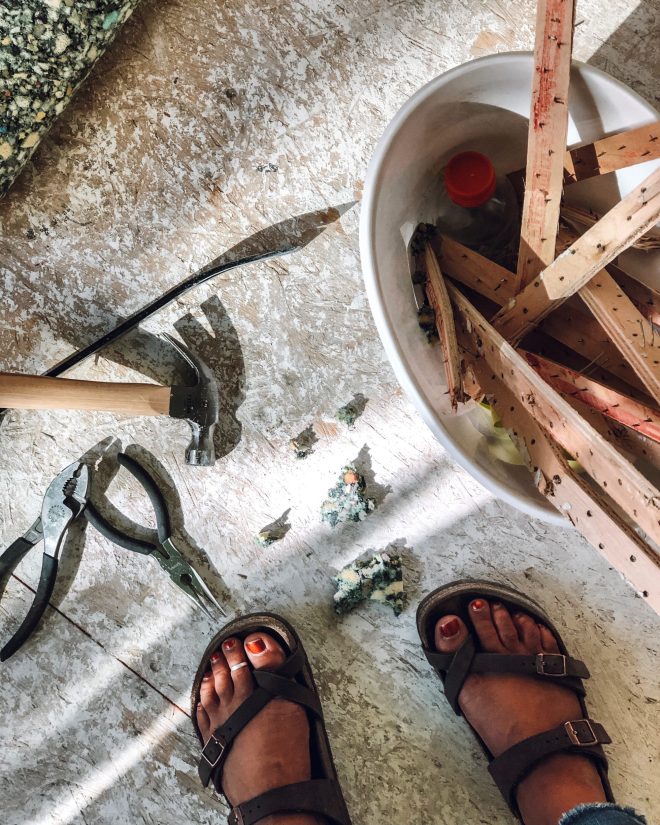
This is BY FAR, the most tedious part of the process because every piece had to be individually cut at different angles. It was extremely challenging to make some of the cuts because many pieces could not be held securely against the ‘fence’ (the back supporting piece of the saw) and they felt unsafe. We ended up hand sawing multiple pieces and cleaning up their edges with a file (in tight corners) and sanding block.

Here’s a video where Frank gives some tips on making weird angle cuts.
FINISHING THE FLOOR
After lots and lots of collected internet research, educated guesses, and v. strong opinions about how I want this floor to LOOK in the end, we devised and executed the following plan of action: Two thin coats of Miniwax Pickling Oak Stain to minimize the yellowing that happens when adding poly followed by four thin coats of a Miniwax Polycrylic Matte Water-based Polyurethane (the same I used for our painted stenciled tile floors).


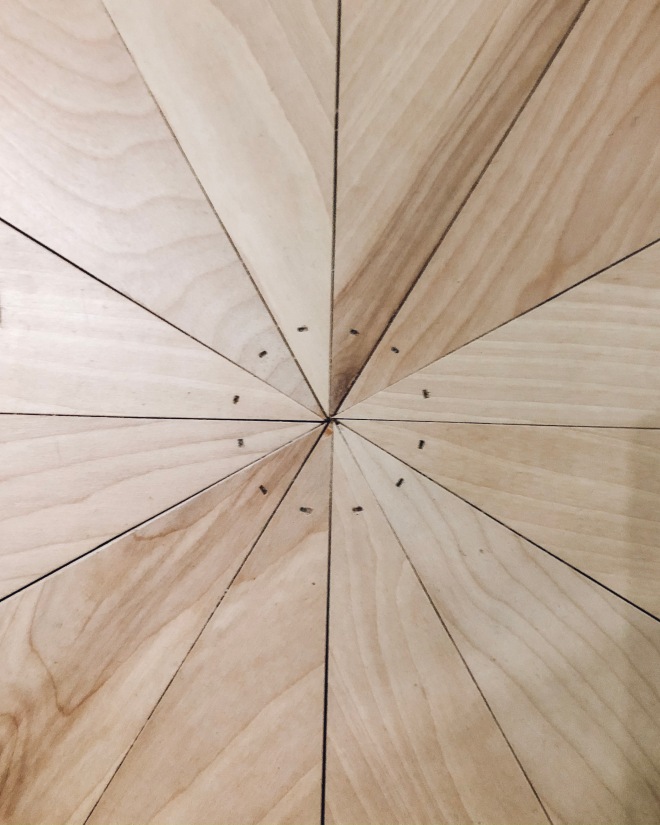
We initially intended to fill all the nail holes with natural color wood filler but decided we really loved the character they added. They’ve since become one of my favorite features of this floor. If you choose to fill yours, this would be the time to do so; Before staining and protecting!
I wanted SO BADLY to skip the staining because time was of the essence and it was nearly invisible on our test pieces, but the difference it made after adding the poly was enormous. Pickling oak stain truly is the secret ingredient to maintaining light, neutral wood tones and eliminating that ‘Polyurethane yellow.’
Pickling oak stain truly is the secret ingredient to maintaining light, neutral wood tones and eliminating that ‘Polyurethane yellow.’
I applied two thin coats of stain with a section of an old t-shirt and allowed it to soak in for 3-4 hours between coats. During the poly application, I used a bristle brush (pictured a few frames above) and a microfiber cloth to wipe away the dust and debris from small sections at a time, then applied a thin coat of poly with a foam roller. I allowed each coat to cure for 3-4 hours and sanded with 220 grit sanding block between each application.
It went something like this: Wipe floors, apply stain, wait, stain, wait, wipe, poly, wait, sand, wipe, poly, wait, sand, wipe, poly, wait, sand, wipe, poly, wait, sand.
Just a little redundancy to clear up any misgivings and really drive home the point that these floors are the ULTIMATE TEST OF PATIENCE AND SANITY.
MIND THE GAP
Many asked how we planned to address the gaps between the pieces and my answer is this: We are simply choosing to ignore them. I know a good bit of poly found it’s way into the cracks and crevices and that gives my heart some comfort. Will dust and cookie crumbs and pillow feathers find their way in regardless? Probably. But with the minimal traffic this guest room sees we’re just not that worried about it. That said, I did fill two that were bugging me with the same tan colored liquid nail I used to stick these triangles to the floor. No reason to be precious about it ya know?
THE MILLION DOLLAR QUESTION: DURABILITY
How will these beautiful babies hold up in the long run? Who knows! But I’m happy to be your guinea pig. I am casually optimistic that they’re going to be just fine. This is not the first time plywood has been used as flooring; A quick google search will turn up hundreds of great examples. But I realize that the complexity of this pattern does change things a bit. The good news is I have a fall back plan. When things start looking shady or janky, I’m just gonna shellac this whole room with a fresh coat of porch paint. That’ll give us a few more years I’m sure of it!
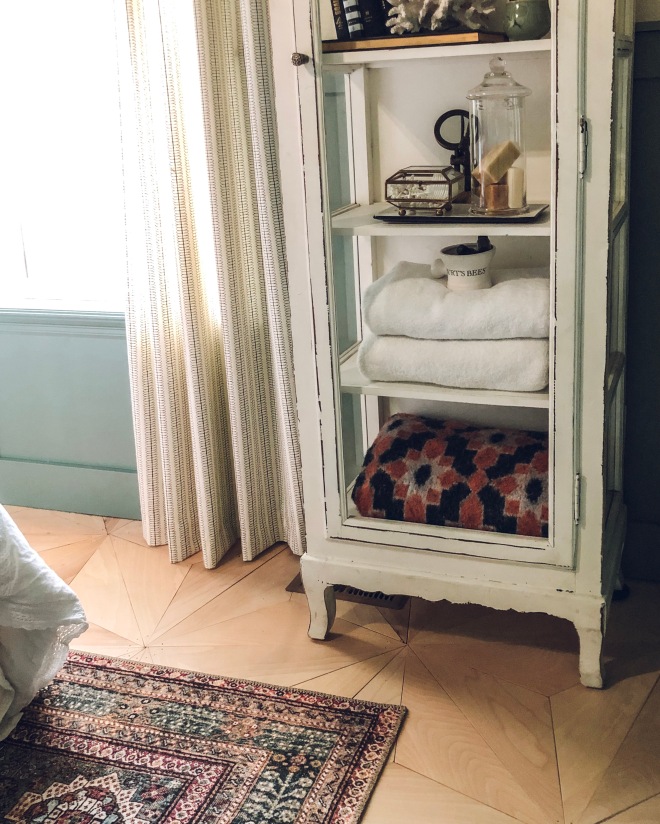
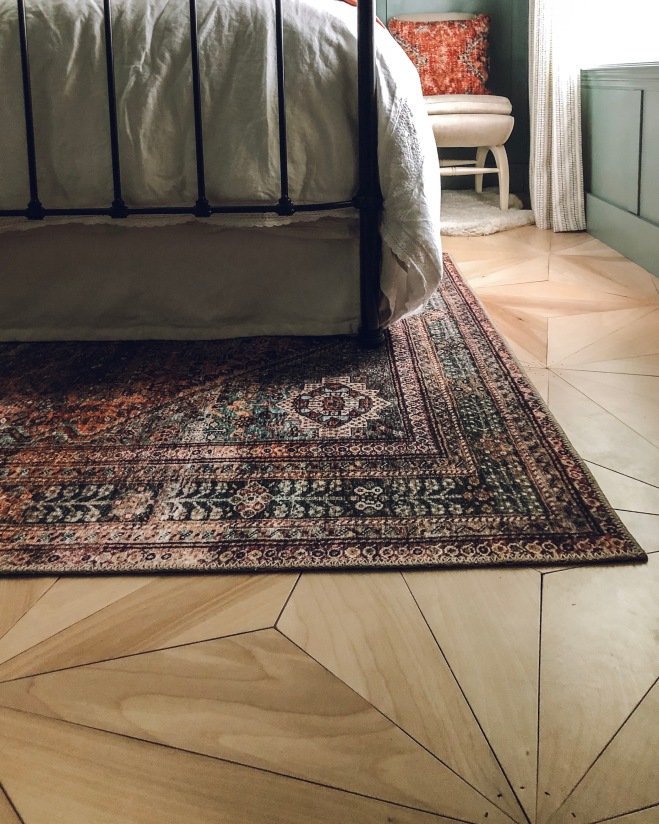
We are absolutely over the moon about how these floors turned out. They were a labor of love for sure but they’re simply stunning in person and make this room feel so special. Our guests are worth every single splinter.
What do you think about the final results?


If you decide to tackle this project in some capacity, I’d love to see your work so please don’t forget to tag me on Instagram!
Thanks for being here!
XOXO,


I love this floor! After much deliberation I’m ready to take the plunge and go for this flooring. One question, I live in a 100+ year old flat with less than even floors, do you think this would cause any issues when laying the pieces?
LikeLike
oooh. That is such a good question that I feel unqualified to answer. My floors were pretty flat. I’m sorry I wish I could be more helpful!
LikeLike
Nice idea !!
LikeLike
Thank you!!
LikeLike